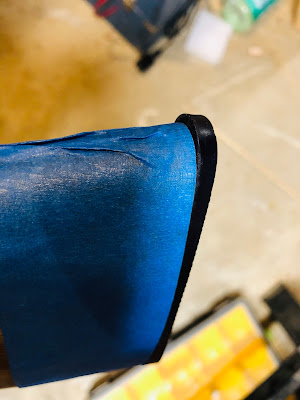
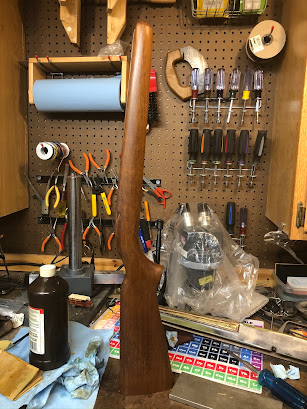
The last step after refinishing was to attach the reproduction butt plate. It was slightly oversize, so I used the standard technique used for fitting rubber recoil pads. Attach the buttplate and wrap the stock with painter’s tape for protection:
Friday, September 11, 2020
Remington 514 Restoration Wrapup
Thursday, August 20, 2020
Remington 514 Restoration Part III
This looked good, so I did more sanding and did a sand-and-fill over the rest of the stock.
From here on I’ll be scuff sanding with 3M abrasive cloth and applying more coats until I’m happy with the depth of the finish. At that point I’ll turn my attention back to the metal parts.
Tuesday, August 18, 2020
Remington 514 restoration, part II
Last month I mentioned that I had acquired a Remington 514 from a friend with plans to restore it. Various projects have intervened since then, including the rebuilding of my Benjamin Marauder air rifle, some overdue tree trimming, and much-needed house cleaning, but I’ve finally gotten around to working on the Remington. Some tests on the barrel show that it’s not as bad as I first thought. Here’s a photo showing the barrel as received, and a section that’s been given a polishing with 3M synthetic steel wool (the red one) and phosphoric-acid based cold blue:
Cleaned up nicely, and this is just a quick test. I’m going to strip the receiver and give the whole thing a good cleaning, polishing, and cold blue.
I’ve also started sanding the lacquer finish on the stock. It looks like walnut, and I think a sand-and-fill with Tru-Oil will look pretty good when I’m done. Stay tuned.
Friday, July 10, 2020
Remington 514 restoration project
I’ve always been a fan of simple (and not so simple) single shot .22s, and used to own several Stevens, Iver-Johnson, and Quackenbush .22s, and until recently still had my Chiappa Little Badger. My .22 collection until a few weeks ago consisted of a Stevens Model 25 and a Savage-Anschutz 10, and that was enough.
Then a good friend called to mention that he’d recently gotten back into shooting, and had purchased a .22 that had always interested him, and by the way, was I interested in a well-worn Remington 514 that he used to use in teaching marksmanship to Boy Scouts? Indeed I was.
The 514 is a simple rifle introduced in 1948 at a price of $14, hence the name. It was made until 1970s, and during that time Remington made an estimated 757,624 of them. That initial $14 price works out to an inflation-adjusted $148 in 2020, which is still pretty reasonable, especially as making this gun required a lot more hand operations and manual machining than do the beginner single shots of today.
Sights are typical for the era: A simple leaf rear sight, and a post and dot front. There are no holes for mounting a scope or peep. My aging eyes make it difficult to use the sights, but if I twist my head enough, I can align the bifocal segment of my glasses with the sights. A small scope would be a reasonable accommodation to age.
My gun has a bit of rust and all the scratches, dents, and pitting you’d expect in a well-used .22 over half a century old, but the bore is clean, and everything works just fine. The buttplate is missing a chunk, but modern reproductions are available for under $20 and I could just as easily make a simple buttplate or add a $9 Pachmayer. The trigger pull is long, and not terribly crisp, but it’s very smooth- again, the product of decades of use.
My only testing has been indoors at 10 yards, using gallery loads (Aguila Super Colibri) and I’ve gotten acceptable, if not exactly stellar, results shooting offhand. I do much better shooting an an pistol at that range, offhand, but then my air pistols have better sights, triggers, and grips.
My first project will be to remove all the visible rust with #0000 steel wool and re-blue with Oxpho-Blue or another good phosphoric acid based cold blue. Next is the buttplate, and maybe I’ll rework the stock finish, giving it a good Tru-Oil matte finish, which looks better than the dipped lacquer finish typically seen on inexpensive rifles of the era.
I’m tempted to have a gunsmith drill and tap it for a scope, and mount one of my Burris Minis. Some might argue that this would take away from the collector value, but given the current value (around $50 in this condition) and the fact that three-quarters of a million were made, it’s not like I’d be destroying history. I see that Boyds has a custom, prefinshied stock available for $152, which is more than excellent examples are selling for. But that might be taking it a bit too far.


