Tuesday, November 21, 2023

Savage Rascal


I had this idea that I wanted to make some kind of pack rifle, which first meant finding a suitable candidate for modification. I first searched for a used single shot .22 LR but while gun stores and pawn shops used to have plenty of these for cheap, the supply seems to have dried up. I then looked for a new gun, concentrating on the inexpensive youth rifles available new. The best of the bunch seemed to be the Savage Rascal, a relatively new gun introduced in 2018. It appealed to me right away based on one feature: The Savage Accutrigger. This trigger, found across the Savage line, is perhaps the best trigger found on any mass market factory rifle. I read a lot of very enthusiastic reviews on forums like Rimfire Central, and so I headed over to the nearest Cabelas and bought one.

Right away, I liked it. The action is very smooth, and the trigger lives up to its reputation. I took it out to a Department of Natural Resources range and put a few boxes of CCI Standard Velocity through it. It performed beautifully and was a lot of fun to shoot, even with the tiny stock.  I did discover that that peep sight did not work well for someone with a large adult sized head- at least, not my head. I ordered the Savage factory scope mounting blocks, but those greatly restrict scope positioning, and didn’t work with any of the scopes in my collection, so that was replaced with an EGW Picatinny rail. After trying a few older scopes I had, I settled on the old Redfield 2-7x scope seen in the photo above. 

That still left the matter of the stock. Surprisingly (to me, at least), no one makes a pack rifle style stock for the Rascal, though you can find such stocks for the Crickett and others. That meant I’d have to make my own, and in the meantime I’d need to extend the stock to make it more comfortable to shoot. I found a Canadian eBay vendor who makes a modular 3D printed adapter and extension available in two lengths, and ordered that. It works well, but the rough 3D printed surface bothered me, so I sanded it down, leaving a light colored surface that flashes with the black stock.


 I’m either going to paint over this with something like Plasti-Dip or perhaps buy an inexpensive black nylon cheek and butt pad to cover it up. Watch this space.

Saturday, June 24, 2023

Ruger 10/22 Redux


A few weeks ago I was going through the basement looking for things to sell, recycle, or throw out when I found a package of three new, unused, Ruger 10/22 magazines. I offered them to a friend who said no, he had all he needed, and I’d probably use them them the next time I bought a 10/22. I had no plans of buying another- I did a target 10/22 build some years ago, which is why I had the magazines- but it got me thinking. I had only recently started going to the range again, having gotten out of the habit during the peak of the pandemic, and I was thinking I needed a project.

I began casually looking for used 10/22s in local stores with on-line, searchable, inventories, but didn’t find anything. Then an impulsive visit to Bass Pro Shops (I was nearby) led to me buying a new 10/22 carbine last week. All they had was the wood stocked model, but I remember that I still had two 10/22 stocks in the basement: A modified target stock, and the synthetic stock from the previous 10/22 project gun.

I also had a collection of scopes, new and old, and after some thought I decided to put one of my Burris Mini 4x scopes on the new gun. 4x is the classic choice for a .22, and the Burris is a rugged, reliable, scope. This is as far as I plan taking it- for now- but I could see putting a better trigger on it, or modifying the stock trigger. Also, I still have that target stock, and if a reasonably priced target barrel were to come my way I might be tempted…

Stay tuned.

Friday, September 11, 2020

Remington 514 Restoration Wrapup

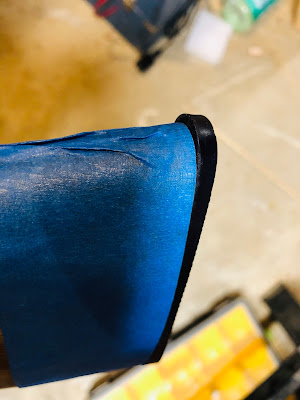
 The last step after refinishing was to attach the reproduction butt plate. It was slightly oversize, so I used the standard technique used for fitting rubber recoil pads. Attach the buttplate and wrap the stock with painter’s tape for protection:


Carefully sand the pad flush with the paper, using a belt sander, disk sander, or sanding block:


Polish the sanded edge of the butt plate with successive finer grades of paper (and a buffing wheel if you have one), and there you are:


(Update: Not too long after I finished the restoration, my friend started having second thoughts and wondered if I might sell it back to him. I said, sure, eventually. He made various offers of swaps, but I surprised him by just giving it to him the next time he dropped by.)


Thursday, August 20, 2020

Remington 514 Restoration Part III

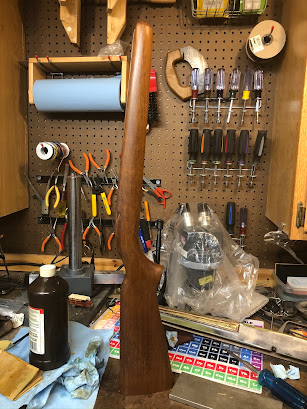
I’ve been concentrating on the stock for now, deciding how far I wanted to go and how much wood I was comfortable with removing. After consulting with a friend I decided not to try and steam out every dent and sand or patch every nick. Instead, I’d remove the lacquer with 220 grit paper and try to get rid of visible scratches. I’d follow that with 320 grit, and when I was happy with the surface, wet sand with Tru-Oil to fill the grain. I did a test first on the butt.


This looked good, so I did more sanding and did a sand-and-fill over the rest of the stock.


From here on I’ll be scuff sanding with 3M abrasive cloth and applying more coats until I’m happy with the depth of the finish. At that point I’ll turn my attention back to the metal parts.